
When you are new to Appointment Aid, your dashboard may seem overwhelming to you. A lot of new customers don’t realize all of the different features available to them when they sign up. One often overlooked feature is the multiple different calendar views each user gets. Using Appointment Aids appointment reminder service, you have the option of using a combination of the “Month view / Day view” or the “Week View”. The different views have different advantages depending on the type of user you are.
Using Month View / Day View:
Month View:
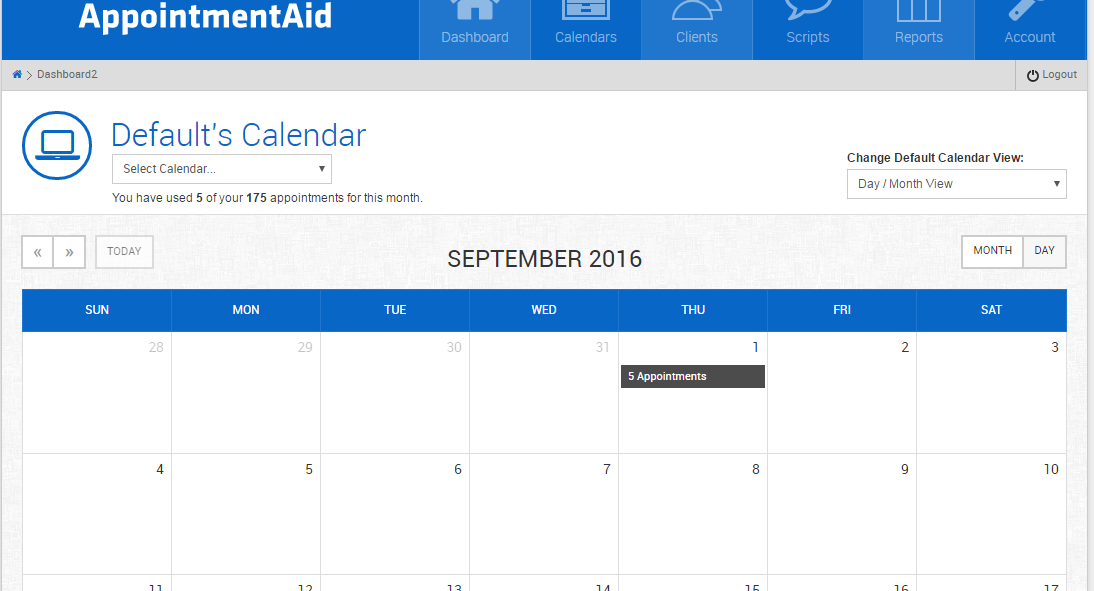
From the month view you get a birds eye view of all of the appointments scheduled for your account for a given month. Each day is populated with a count of total appointments for that day on that specific calendar. As you can see, this customer (our test account) only has 5 scheduled appointments on September 1st, and no other appointments. Let’s click the day of September 1st to trigger the day view to show.
Day View:
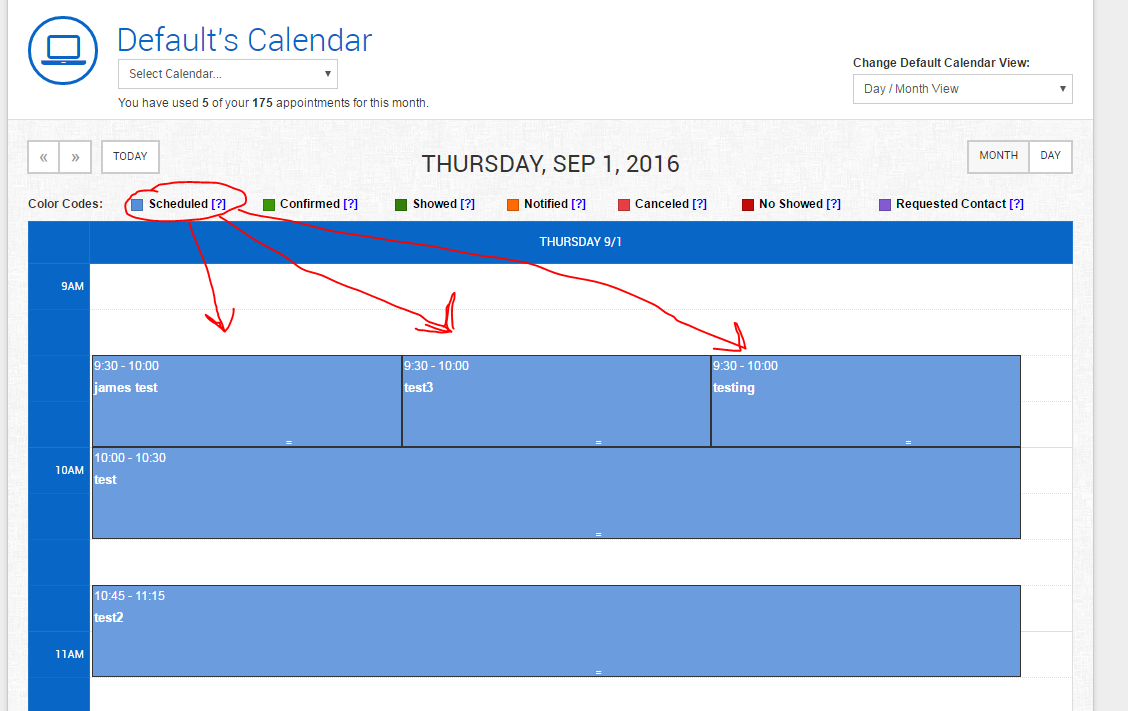
In the day view for September 1 you can see all 5 of the appointments are in the “scheduled status” which means appointments have been scheduled in the system, but reminders have not yet been sent out for this appointment. The other possible status codes are listed in a horizontal line as seen in the image. Below that you can see multiple appointments scheduled for various “test” clients.
Using Month/Day view is better for users who like to schedule multiple clients during the same time slot. This is because in the week view when you schedule multiple clients using the same time slot, it appears poorly in the user interface as you will see in an image below.
Using Week View:
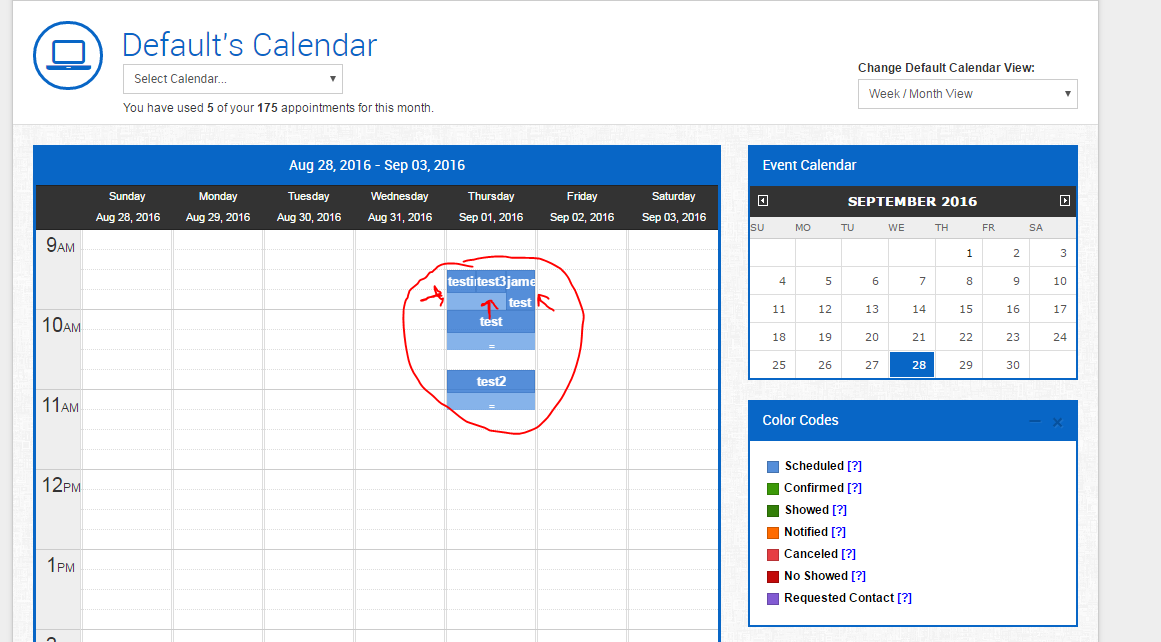
Week/Month View is the standard setup for new Appointment Aid users. For most users it is perfect and exactly what they need. They have a small month calendar on the right to choose what week they want to work with and the main week view on the left to add and edit appointments. However, as mentioned above, if you are a Business that schedules multiple clients during the same appointment time slot, Week view looks pretty bad. You can see in the picture above the same 3 appointments that had plenty of room in day view are very crammed in week view. This user would benefit much more from using the day view.
How To Switch Views
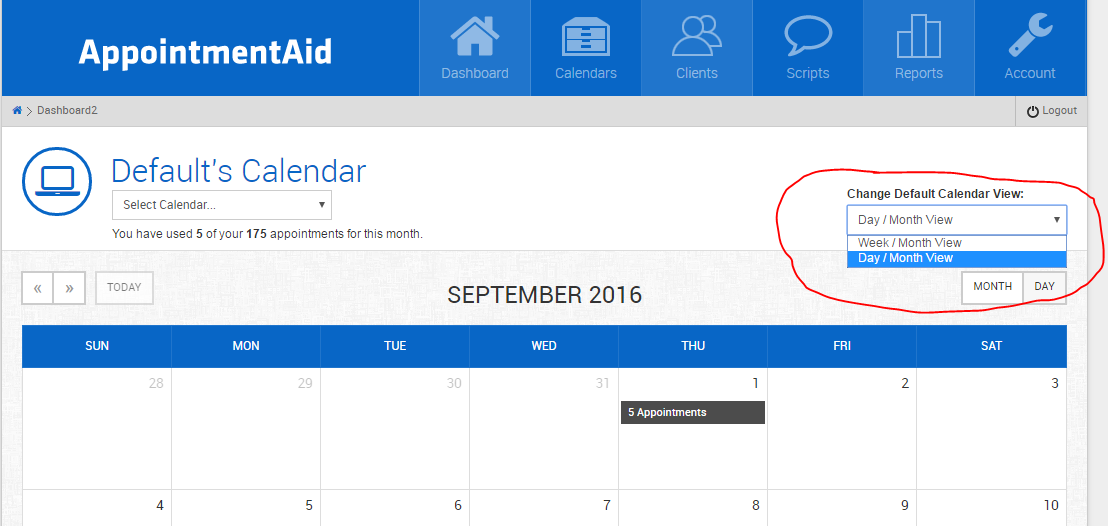
Now that I’ve explained the pro’s and cons of the different views it’s time to show just how simple it is to change between these views. To change between views is extremely simple. All you do is click the dropdown box on the top right of the screen that says “Change Default Calendar View:” and then select which view you’d like to see. From that point on that will be the view that loads for your account by default. You can always go back and change it though. Here is a picture showing the dropdown box location:
Pretty simple right?
Thanks for checking us out and if you’ve never used us before, sign up to try us free for 30 days here!

